You can only edit an active contact (or a contact with an active case that is not closed). Fields may or may not be editable based on the following:
- Everyone can edit the preferred name, preferred phone, emergency contact information, and LDS Account ID.
- If you selected a member using the Member Search function, several fields are populated with information from the Church Membership Information System (CMIS). However, this information is only copied over once and is editable.
- Some fields are editable based on your role.
- For non-store associates, all fields can be edited.
These icons have special meaning as you view and edit a contact:
| Lock icon |  |
|
| Red asterisk |  |
|
- 1 Click a field to edit it.
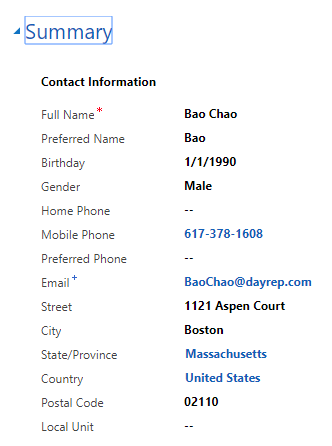
- Contact Information: Add or edit information as needed. Note: The State/Province and Country fields are search fields. For instructions on how to select an item in a search field, refer to Native Language below.
-
Native Language: Click the field and either enter part of the language name and click the search icon or just click the search icon. Click the language to select it. If the language is not listed, click Look Up More Records to see the complete list.
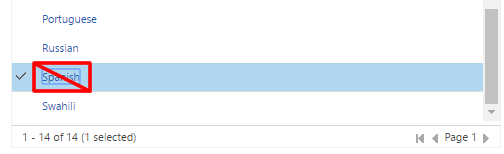
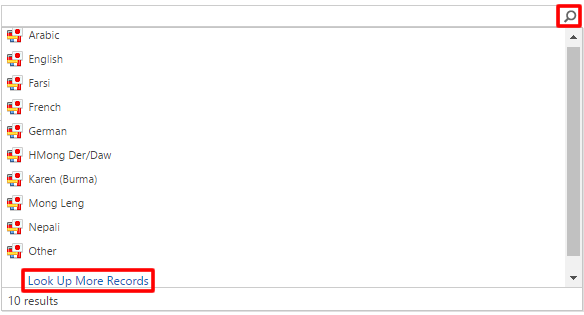 On the Look Up Record screen, if there is something in the Search field, delete it and press Enter to refresh the list. Scroll through the list, click the white space to the left of the list item to select it, and click Add.
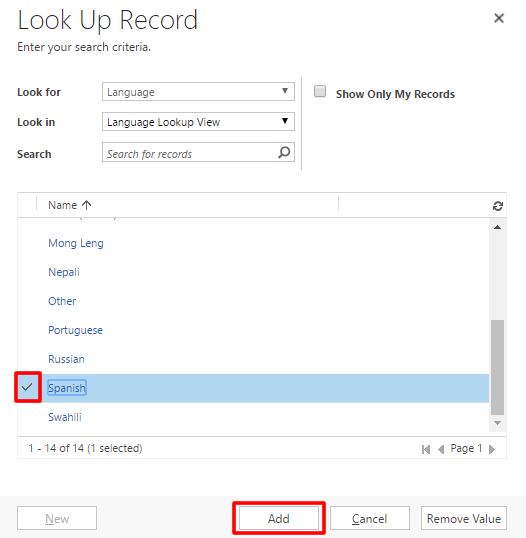 Note: On this screen, do not click the list item itself. That opens another window about that list item.
- English: Click the field, and then click the search icon to select the associate’s English proficiency if needed.
- PWD: Click to toggle the PWD (person with disability) field between Yes and No.
- Refugee: Click to toggle the Refugee field between Yes and No.
- Member: The Member field is usually set during the referral process. If you need to change this field, click the field and select the correct option.
- LDS Account ID: Click the field and enter the associate’s LDS Account username. If the associate does not have an LDS Account, help him or her to create one. The associate will need an LDS Account to see the associate portal. He or she must have an email address to get an LDS Account.
- Emergency Contact: Enter the name and contact information. The Relationship, State/Province, and Country fields are search fields. For instructions on how to select an item in a search field, refer to Native Language above.
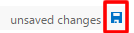
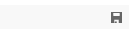
- 2 At the bottom right, click the blue save icon. Note: The system automatically saves changes every 30 seconds. If there is no “unsaved changes” message next to the save icon and the icon is gray, your changes have been automatically saved.
 |
 |
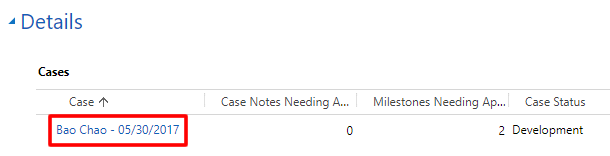
Note: At the bottom of the Contact page under Details, you can click a case title to view case information.